How to Build a Putting Green at Home
Learning how to build a putting green at home lets you transform an ordinary yard into a dedicated short-game practice area with smooth ball roll and year-round convenience.
Most people spend hours driving to a local golf or country club just to work on their putting surface feel, but building a DIY putting green right in your garden or backyard saves money, adds property value, and dramatically sharpens your shots.
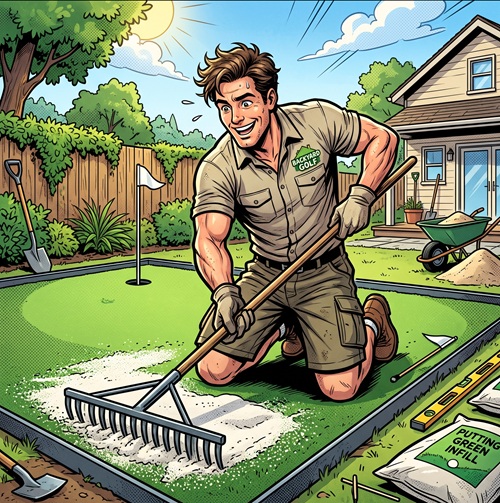
Whether you have a small green idea for limited space or a sprawling green complex in mind, taking on a DIY backyard project is a great addition to any home.
Building a backyard putting green gives you the freedom to practice your putting routine whenever you have a free moment, morning or night.
Instead of dealing with crowded practice facilities, you can step right outside your house to work on high-pressure putts on a green surface built to your exact preferences.
You control every aspect of the project, from hole locations and slope to fringe style and surrounding landscape.
With the right planning, high-quality synthetic turf or natural grass, and proper base compaction, a homemade putting green delivers authentic performance for years.
Planning Your Backyard Putting Green
Proper planning is the back end of every successful DIY project.
Before you dig up a single inch of land, you need to evaluate your available space, measure the area, state your budget, and decide on the scope of your new green.
Choosing the Location and Space Requirements
Assess your yard to find the best bet for placement. You want a flat or gently sloping space away from windows to avoid broken windows from rogue shots.
1. Space
Measure your yard to see if you have room for a 100-square-foot small green or a multi-cup layout.
2. Safety
Position the green away from your house, or set up the best golf hitting net nearby if you plan on taking longer pitch shots.
3. Light and Trees
Avoid installing under trees where roots can ruin your solid foundation or falling leaves create extra prep work.
Natural Grass Green vs. Artificial Turf
Deciding between a real grass surface and synthetic putting greens dictates your future maintenance and cost.
| Feature | Natural Grass Green | Artificial Turf |
|---|---|---|
| Initial Cost | About $18 to $20 per square foot | Higher initial turf investment |
| Maintenance | Daily mowing, regular fertilizer, intense care | Virtually zero maintenance; brush occasionally |
| Durability | Vulnerable to heat, rain, and disease | High weather resistance, can last over 10 years with proper maintenance |
| Ball Roll | Authentic normal green feel | Consistent PGA-style green surface |
For most DIY builders, synthetic turf is the best option because maintaining real grass requires specialized greens mowers, strict watering schedules, and constant chemical treatments.
Annual upkeep for natural grass can exceed $10,000. On a golf course scale, a natural grass green can cost over $2.5 million, which is far beyond a backyard build.
Choose high-quality materials such as UV-resistant turf for better long-term performance.
Materials and Tools Needed for DIY Installation
Gathering your materials ahead of time prevents delays during construction. You can rent heavy machinery from local supply shops.
- Turf and Fringe: Premium putting green turf, surrounding fringe grass, and landscape spikes or non-galvanized nails.
- Base Materials: Crushed stone (Class 2 road base or crushed rock) and fine sand or decomposed granite.
- Hardware: Golf cups, flags, seam tape, and heavy-duty turf adhesive.
- Tools: Shovel, rake, utility knife, plate compactor, infill spreader, and a heavy push broom.
Comprehensive Preparation and Sub-Base Construction
Building a smooth putting surface relies heavily on the work done beneath the turf. A putting green is only as good as the sub-base supporting it, meaning you cannot skip steps during excavation or ground preparation.
Excavation Techniques
Start by outlining your desired shape using spray paint or garden hoses.
Dig out the grass and topsoil to create a cavity about 6 inches deep, and excavate some of the surrounding area if needed for proper drainage and fringe grass.
Remove all organic material, including tree roots, rocks, and weeds. Clearing organic debris prevents future settling or uneven spots as it decomposes over time.
Installing Geotextile Fabric
Once you’ve excavated and leveled the ground with a rake, lay down a layer of heavy-duty geotextile weed barrier fabric.
This fabric serves two critical roles: it stops weeds from growing through your crushed stone base, and it stabilizes the soil beneath your base layer to prevent shifting over seasons.
Building and Compacting the Sub-Base
Spread your sub-base material, typically Class 2 road base or fine crushed rock, with a 2- to 4-inch gravel or crushed-rock base for synthetic greens, over the fabric in 1.5-inch to 2-inch lifts.
Good drainage in the base is critical to keep water from pooling beneath the green.
1. Spread the first layer of crushed rock evenly across the excavated footprint.
2. Lightly spray the area with water using a hose to help the particles lock together.
3. Pass over the area multiple times with a plate compactor until the surface feels rock-hard.
4. Add the second layer of base aggregate or fine sand/decomposed granite to create a silky-smooth finish.
5. Compact the second layer thoroughly, shaping any gentle breaks or slopes you want on your green complex. Roughly a 2% slope adds challenge and supports runoff during play.
An entirely flat green reduces practice variety and interest.
Step-by-Step Guide: How to Build a Putting Green at Home
Creating a pro-quality backyard green surface takes systematic effort. Follow this step-by-step process to lay down a pristine DIY backyard putting green.
Step 1: Laying and Positioning the Turf
Unroll your synthetic turf over the compacted stone foundation. Let the turf sit in the sun for 30 to 60 minutes before cutting or securing.
The sun warms the rubber backing, making the turf pliable, easy to stretch, and free of shipping wrinkles.
Ensure the turf fibers (grain) face toward your main viewing angle or primary hitting position for the best appearance and natural ball roll.
Step 2: Trimming and Seaming Turf Sections
If your putting green width exceeds the roll size of your turf, you will need to join two pieces using outdoor seam tape and turf adhesive:
- Lay both pieces side-by-side, aligning the grain direction perfectly.
- Trim the factory edges back by 2 to 3 blades to ensure clean, tight seams.
- Place seaming tape directly beneath the joint on top of the base layer.
- Apply heavy-duty polyurethane turf glue across the tape using a notched trowel.
- Press both turf edges firmly into the adhesive, ensuring no synthetic grass blades get trapped in the glue.
- Place heavy weight (like stone bags or bricks) along the seam for 2 to 4 hours while the glue cures.
Step 3: Setting the Golf Cups
Mark multiple cup locations on the turf using chalk or land spray paint so the putting green offers varied practice angles and more fun.
- Use a sharp utility knife to cut circular turf sections that match the outer diameter of your golf cups.
- Dig a hole in the compacted base directly under each cut opening, making it slightly deeper than the cup height.
- Place a small layer of pea gravel at the bottom of the hole for drainage.
- Insert the cup so its top edge sits roughly 1/4 inch below the finished turf backing height.
- Secure the cup in place with quick-setting concrete or densely packed sand to hold it steady.
Step 4: Anchoring the Edges
With your turf laid out and hole locations set, anchor the perimeter securely to prevent shifting over time:
- Pull the turf taut across the entire surface area.
- Drive 6-inch non-galvanized landscape spikes or turf nails along the outer edges every 6 to 8 inches.
- Countersink the spikes slightly below the turf backing so they don’t catch your golf balls or lawn mower blades along the fringe.
Step 5: Applying Infill and Tuning Roll Speed
Silica sand infill gives synthetic putting greens their weight, stability, and variable ball speed (Stimpmeter rating):
Roll the surface with a heavy lawn roller to pack the infill down and tune your ball speed for realistic rolling performance.
Use a drop spreader to distribute rounded, washed silica sand evenly across the putting green surface (typically 1.5 to 2 pounds of sand per square foot).
Work the sand deep into the grass fibers using a stiff push broom or power broom, sweeping against the grain to stand the blades up.
Add additional sand layers in small increments until only the top 1/8 inch of grass blades remains exposed.
Long-Term Maintenance Tips for Synthetic and Natural Greens
Keeping your putting green in peak condition requires routine care based on the green type you choose.
Maintaining Artificial Turf Greens
Synthetic greens require minimal labor compared to real grass, and maintenance is basically limited to light cleanup and occasional grooming.
With proper maintenance, synthetic greens can last over 10 years, which is why these simple upkeep tasks matter:
Debris Removal: Use a leaf blower or soft plastic rake weekly to remove leaves, twigs, and organic debris.
Brushing: Brush the putting green against the grain once a month to prevent fiber matting in high-traffic areas.
Infill Top-Offs: Inspect sand infill levels annually; add a light top dressing of silica sand if heavy rain or foot traffic has displaced infill.
Weed Control: Inspect the perimeter edges annually and spray any stray weeds growing through edge seams with a mild weed killer.
With quality construction and materials, homeowners have less to worry about over time.
Maintaining Natural Grass Greens
If you opted for a traditional natural-grass green, anyone hoping for a smooth surface should expect a rigorous daily schedule:
- Mowing: Mow daily with a specialized reel mower set to 1/8 inch for true green speed.
- Watering: Water deeply early in the morning to encourage deep root growth without promoting fungal disease.
- Aeration & Topdressing: Core-aerate twice a year and apply fine topdressing sand to maintain smooth, level micro-contours.
- Fertilization: Apply balanced nitrogen, potassium, and micronutrient treatments every 3 to 4 weeks during the growing season.
Bentgrass is ideal for cooler climates, Bermudagrass thrives in hot summer temperatures, Poa annua suits damp winter conditions, and ryegrass is commonly used for its resilience.
Frequently Asked Questions
What is the cheapest way to build a putting green?
The cheapest way to build a putting green is by completing a DIY installation using budget-friendly synthetic turf over a simple crushed stone base.
By doing the prep work, digging the ground, and laying the turf yourself, you completely eliminate professional labor charges, which normally make up over half the total cost.
Sourcing base materials like crushed rock and fine sand from local landscape suppliers, rather than big-box retailers, keeps material expenses low.
Opting for a smaller footprint, such as a 100-to-200-square-foot putting green, drastically reduces the square footage of synthetic putting greens and fringe turf required.
Using basic tools like hand shovels, heavy rakes, and a rented plate compactor saves money while ensuring a solid foundation.
While natural grass seed is cheap upfront, it costs far more long-term in mowers and maintenance.
How hard is it to build your own putting green?
Building your own putting green is moderately challenging, requiring physical stamina and careful attention to base leveling rather than expert craftsmanship.
The most labor-intensive part is the prep work, which involves digging up native sod, hauling tons of crushed stone, and compacting multiple base layers to ensure proper drainage.
Anyone comfortable operating a plate compactor, spreading sand, and cutting materials with a utility knife can build a backyard putting green successfully.
Seaming synthetic turf sections together and cutting clean hole locations requires patience to avoid visible gaps or uneven spots.
While it demands a solid weekend of heavy lifting, straightforward DIY guides make the process manageable for most dedicated homeowners.
How much does it cost to build your own putting green?
Building your own putting green typically costs between $6 and $12 per square foot for a completed DIY project, compared to $15 to $40 per square foot for professional installation.
A modest 200-square-foot DIY backyard putting green generally costs between $1,200 and $2,400 in total materials.
Key expenses include synthetic turf ($3 to $8 per sq ft), crushed stone sub-base material ($2 to $4 per sq ft), silica sand infill, golf cups, and landscape spikes.
Equipment rentals, such as a plate compactor for a day or two, usually add around $100 to $200 to your budget.
Overall, building it yourself cuts overall project costs by roughly 50%.
How to make an indoor putting green at home?
Making an indoor putting green at home requires building a raised wood frame or utilizing modular foam base panels on a flat indoor floor.
Start by measuring your designated indoor space, such as a spare room, basement, or garage.
Build a low-profile platform with 2×4 lumber and a smooth plywood top, or lay interlocking high-density foam tiles directly on carpet or hardwood.
Cut holes in your sub-floor platform to accommodate shallow golf cups.
Stretch premium indoor putting turf across the platform, securing the perimeter with heavy-duty carpet tape or short staples for a tight, smooth finish.
Trim the edges cleanly against your room walls or frame boundary.
Finally, brush in a light layer of infill or vacuum the surface thoroughly so your indoor putting green delivers a clean, consistent roll for year-round practice.